
Let me paint you a familiar picture. You’re standing in front of your bathroom mirror, eyeshadow palette open, YouTube tutorial paused, and somehow — somehow — what’s happening on your eyelids looks nothing like what’s on your screen. The blending went sideways. The liner is uneven. One eye is a masterpiece and the other one is going through something entirely different. Sound familiar? Eye Makeup Techniques
And still, my eye looks ranged from acceptable to actively concerning. Then I realized the problem wasn’t skill — it was foundation knowledge. Nobody had explained the why behind the techniques, just the what. Once I understood the logic behind blending, color placement, and eye-shaping principles, everything clicked almost overnight. That shift is exactly what this guide is built to give you. Let’s go through every essential eye makeup technique together, from absolute basics to genuinely impressive looks.
The Essential Tools You Need Before Any Technique Works
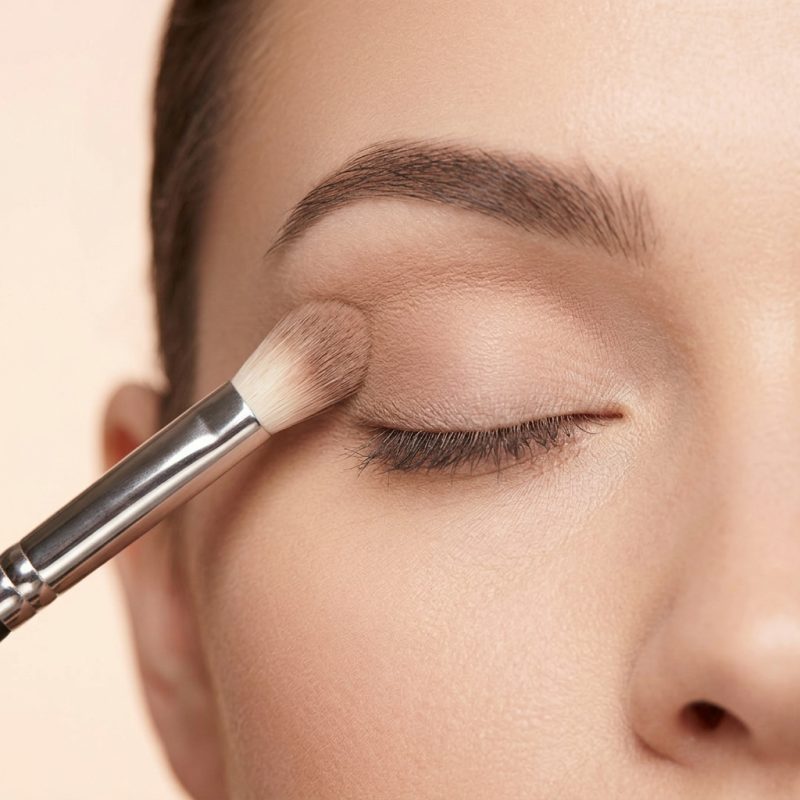
Before we talk about a single technique, let’s talk about tools — because the right brush makes or breaks every eye look, no matter how good your products are. Eye Makeup Techniques
The most common eye makeup mistake isn’t poor blending or wrong color choices. It’s trying to execute techniques with the wrong tools entirely. A flat eyeshadow brush cannot blend. A blending brush cannot pack color. Using one brush for everything is the fastest route to muddy, unimpressive eye looks.
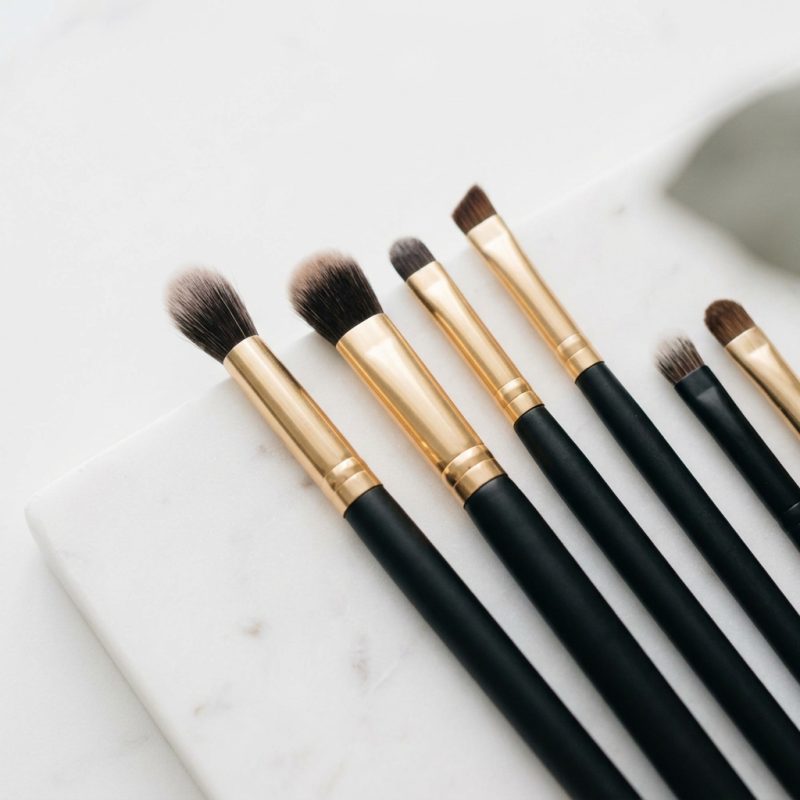
The Core Eye Makeup Brush Set
- Flat shader brush — for packing eyeshadow directly onto the lid with full color intensity
- Fluffy blending brush — the most important brush you own; for diffusing edges and creating seamless transitions
- Small pencil brush — for precise detail work, lower lash line application, and inner corner highlighting
- Angled liner brush — for applying gel liner or shadow as liner with control and precision
- Spoolie brush — for grooming brows and diffusing harsh eyeshadow edges with a light hand
The golden rule of brushes: Use a flat brush to apply, a fluffy brush to blend. These two actions require completely different bristle shapes and densities. Once you separate them, your eye looks will immediately improve.
Other Non-Negotiable Tools
- Eyeshadow primer — without it, shadow fades, creases, and loses vibrancy within hours
- Setting spray — locks your entire eye look in place and intensifies color simultaneously
- Tape or an eyeshadow shield — for achieving clean edges and crisp cut crease lines
Eye Makeup Techniques for Beginners: Start Here
If you’re newer to eye makeup or rebuilding your skills from the ground up, these are the techniques that give you the highest return on your learning investment.
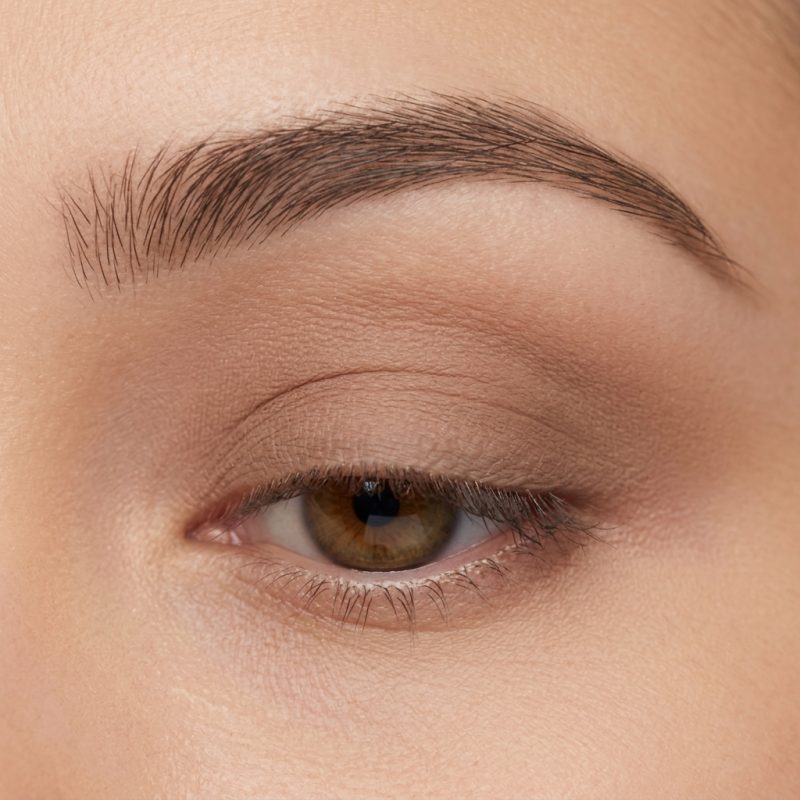
The Three-Color Lid Formula
The three-color formula is the framework every beginner needs to understand because it makes every eye look make sense. It creates depth, definition, and dimension using exactly three shades applied to specific zones.
- Shade 1 (Transition color) — a matte shade one to two steps darker than your skin tone; applied to the crease area to create depth
- Shade 2 (Lid color) — your main color; packed directly onto the center and inner portion of the eyelid
- Shade 3 (Highlight) — a light, often shimmery shade; applied to the inner corner and brow bone to open up the eye
The transition color is the secret ingredient most beginners skip. Blending a neutral matte into the crease first creates a ready-made base that makes every other color you apply on top look more intentional and seamlessly blended.
Basic Blending Technique
Blending is the skill that separates acceptable eye makeup from genuinely beautiful eye makeup. It’s also the technique that improves most dramatically with a small amount of focused practice.
- Work in small, windshield-wiper motions at the crease — side to side, gradually widening the arch
- Use a clean, fluffy brush with zero product to soften any edges that look too harsh
- Blend in circular motions over the entire lid area to diffuse color transitions
- The harder you press, the smaller the blended area — use a light hand for maximum diffusion
FYI — the most common blending mistake is using too much product on the brush. Tap off the excess before every application. Starting light and building up is infinitely easier than trying to soften an overloaded brush that deposited too much pigment in one place. 😊
Intermediate Eye Makeup Techniques: Leveling Up
Once you’re comfortable with blending and basic color placement, these techniques open up an entirely new range of looks.
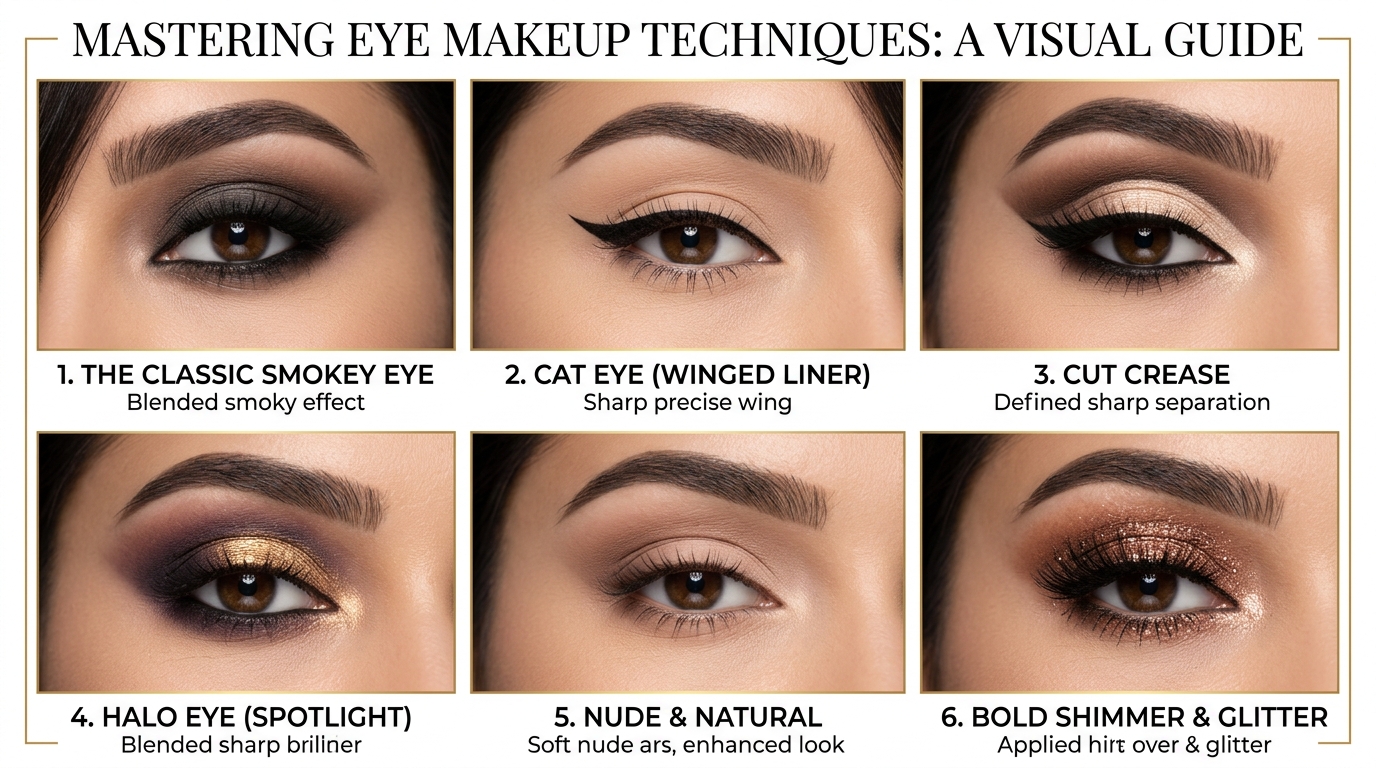
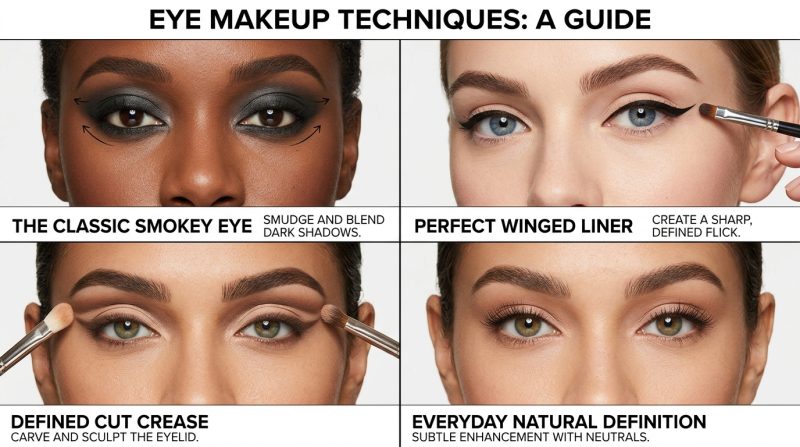
The Smoky Eye
The smoky eye is the most iconic eye makeup look in existence — and it’s significantly more achievable than its reputation suggests. The secret is understanding that a smoky eye is about gradual intensity building, not aggressively dark color applied all at once.
- Start with a medium-toned matte shadow all over the lid and blended into the crease
- Deepen the outer corner and crease with a darker shade, blending in a circular “C” motion
- Add black or dark brown shadow to the outer third of the lid and blend inward — never outward
- Apply the same dark shadow underneath the lower lash line and blend downward to diffuse the edge
- Highlight the inner corner and brow bone to balance the darkness and keep the eye from looking heavy
The smoky eye rule everyone forgets: The darker your lid color, the more important your highlight placement becomes. A bright inner corner highlight literally lifts the entire look and prevents the eye from appearing sunken or closed.
Eyeliner Techniques
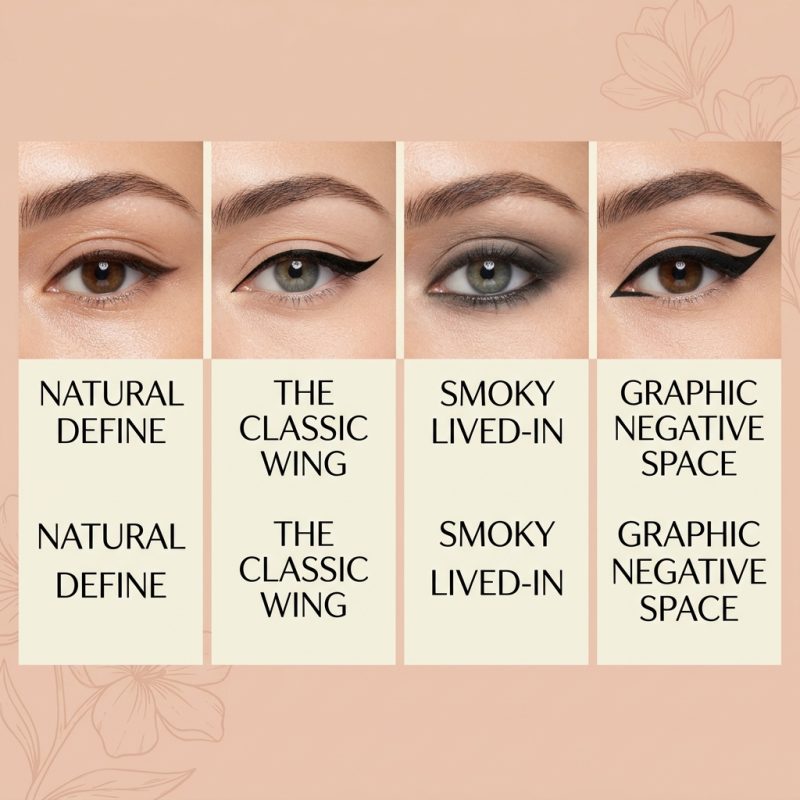
Eyeliner is where most people experience their biggest frustrations — and most of that frustration comes from attempting a technique that doesn’t suit their eye shape or choosing the wrong formula for the effect they want.
The Classic Tightline
Tightlining means applying liner to the upper waterline — the inner rim of the upper lid — rather than above the lashes. It makes lashes look fuller, denser, and more defined without creating a visible liner line.
- Use a waterproof pencil liner or gel liner for the best waterline adherence
- Apply in short, dabbing motions along the inner rim rather than dragging across
- Black tightlining creates maximum impact; brown or dark taupe for a more natural effect
- Combine with mascara for a naturally defined eye that looks like you have significantly more lashes than you do
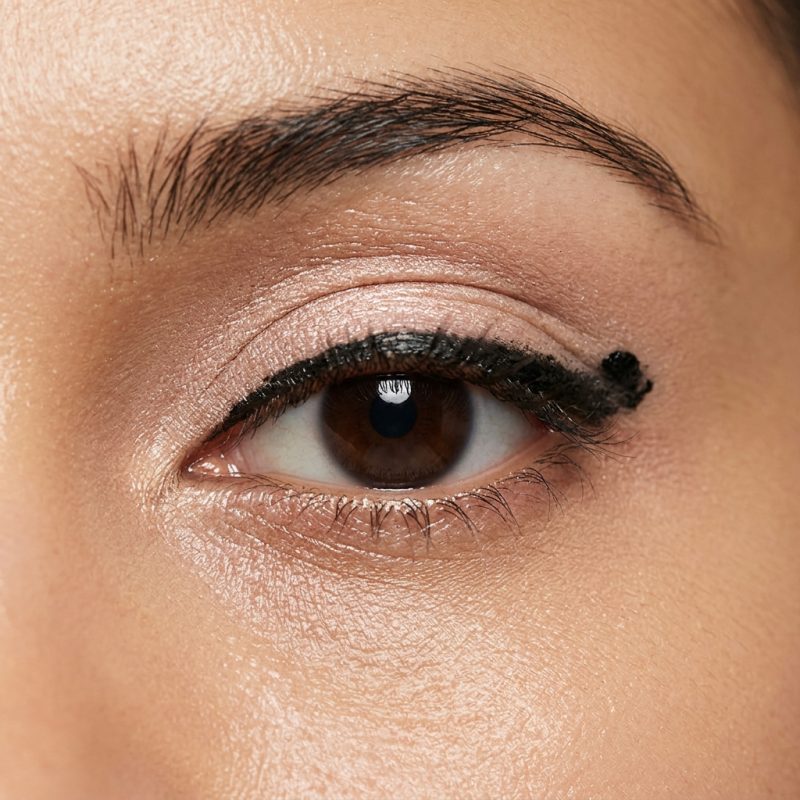
The Winged Liner
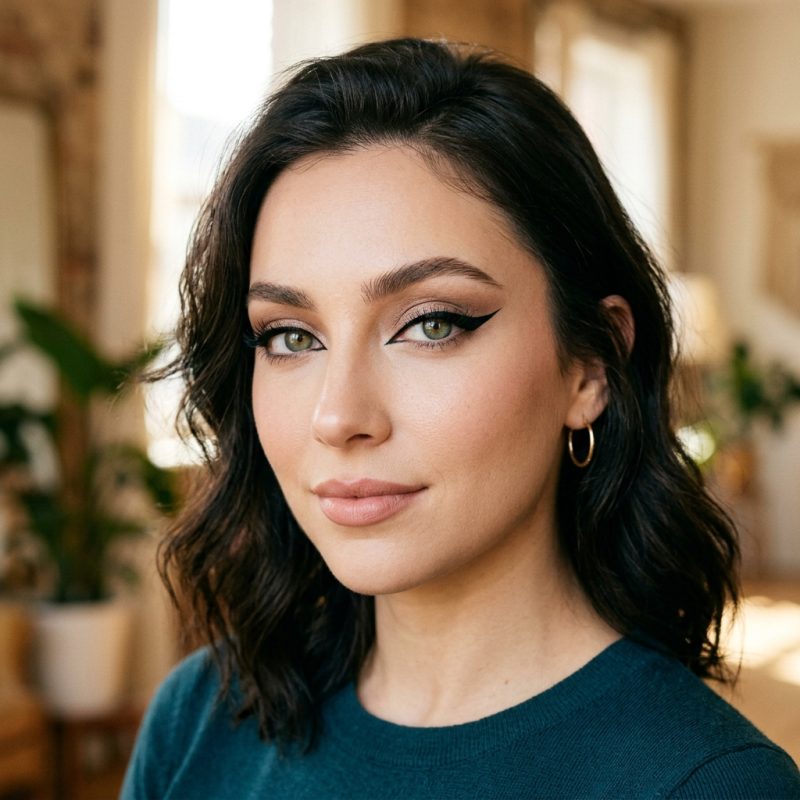
The winged liner is a technique that intimidates almost everyone initially and becomes almost effortless with practice. The key is understanding the geometry before picking up the liner.
- Draw the wing first — point it toward the end of your eyebrow, not straight outward
- The wing angle should follow the lower lash line extended — use a straight edge or tape as a guide if needed
- Start thin at the inner corner and gradually thicken toward the outer edge
- Connect the wing back to the lash line and fill in any gaps with small strokes
- Use a cotton swab dipped in micellar water to clean any uneven edges instantly
IMO, the single most helpful winged liner tip is to draw both wings before perfecting either one. You’ll match them to each other rather than agonizing over one perfect wing and then failing to replicate it on the other eye.
The Cut Crease
The cut crease is one of the most striking intermediate techniques — it creates a sharp, graphic definition between the lid color and the crease color that makes eyes look dramatically more defined and lifted.
- Apply a matte transition shade throughout the crease first and blend well
- Apply concealer directly to the lid with a flat brush — this creates the “cut” line and intensifies whatever color goes on top
- Set the concealer with a loose translucent powder so shadow applies smoothly over it
- Pack your lid color directly on top of the concealed area with a flat brush, keeping a hard edge at the crease
- The contrast between the sharp lid color and the blended crease color creates the cut crease effect
Advanced Eye Makeup Techniques: The Show-Stopping Looks
These techniques require more practice but deliver genuinely stunning results that photograph beautifully and command attention in person.
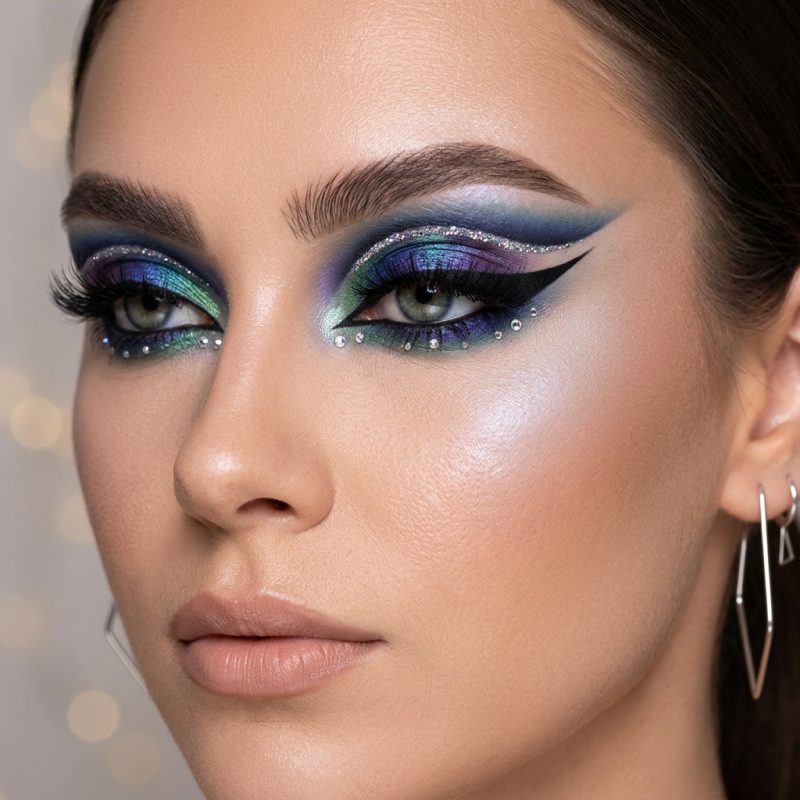
Halo Eye
The halo eye places the lightest, most reflective color at the center of the lid and surrounds it with deeper, darker shades on both the inner and outer corners. The result is a dimensional, three-dimensional effect that makes eyes appear rounder and more prominent.
- Apply a dark or rich shade to both the inner and outer corner of the lid
- Place a bright shimmer or glitter shade at the center of the lid, concentrated directly over the iris
- Blend the edges where the center color meets the corner colors with a small blending brush
- Repeat the center shimmer on the lower lash line underneath the iris for a complete, cohesive look
The halo eye works magnificently in jewel tones — deep burgundy, emerald, navy — with a gold or champagne shimmer at the center. It’s one of the most photographable eye looks in existence.
Graphic Liner and Floating Liner
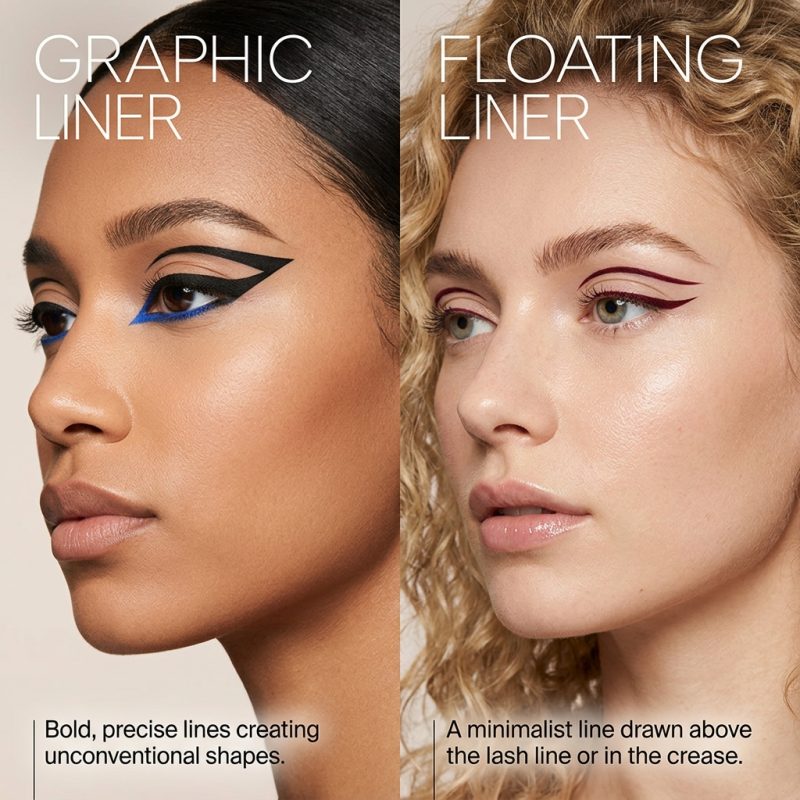
Graphic eye looks have dominated editorial beauty and social media for the past several years — and they’re far more achievable than they appear on screen.
- Floating liner is applied above the crease rather than along the lash line — it creates a graphic, unexpected line that lifts the eye dramatically
- Use a felt-tip liquid liner for the cleanest, most precise lines
- Geometric shapes — triangles at the outer corner, graphic flicks above the crease, double wings — each create a completely different effect
- Colored liner in blue, green, or white makes graphic looks even more striking and modern
Glitter and Duochrome Techniques
Glitter application is where so many people go wrong — and usually because they’re applying it over dry shadow with the wrong tool.
- Apply glitter over a sticky base or glitter glue for maximum adhesion and minimum fallout
- Use a flat, damp brush or your fingertip to press glitter onto the lid — never sweep or drag
- Duochrome shadows shift between two colors depending on the angle — maximize this effect by applying them over a dark base and viewing in natural light
- Press, don’t sweep is the cardinal rule of glitter application — it is the difference between stunning and sparkly chaos
Eye Shapes and How to Enhance Them
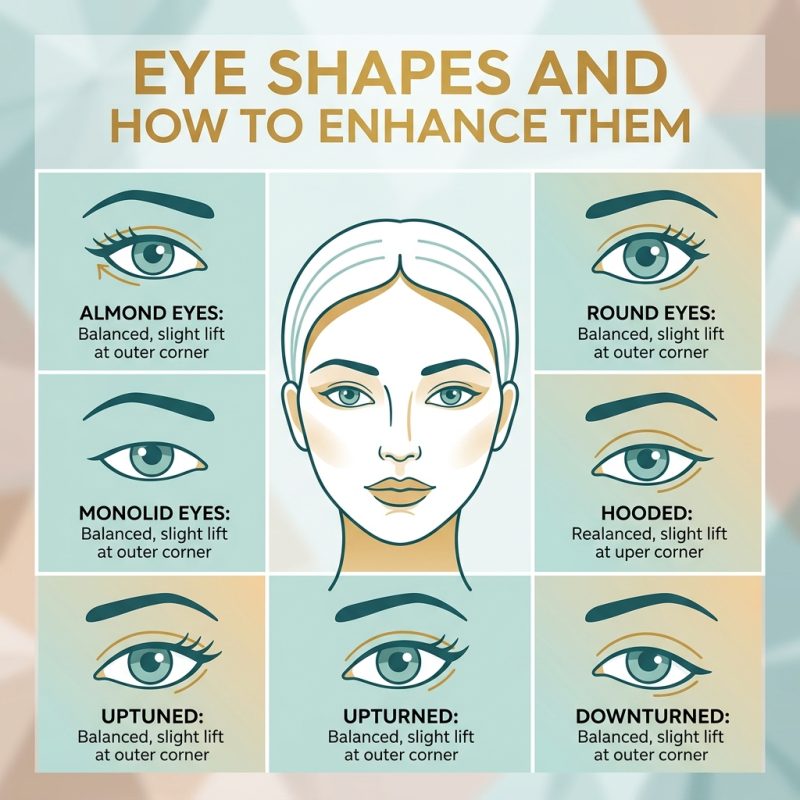
Understanding your eye shape transforms your approach to every technique above. The same technique applied differently creates completely different effects.
Monolid Eyes
- Focus color on the outer third and blend upward to create the illusion of dimension
- Tightline the upper waterline to define without adding unnecessary visual weight
- Graphic liner looks are exceptionally beautiful on monolids — the flat surface is a perfect canvas
Hooded Eyes
- Apply all shadow slightly higher than feels natural — the hood covers the lid when eyes are open, so you need to work above it
- Matte shadows define hooded eyes beautifully; heavy shimmer can make them appear smaller
- Tightlining is more effective than traditional liner on very hooded lids
Round Eyes

- Elongate with a wing that extends past the outer corner and points upward
- Dark shadow on the outer third pulls the eye shape into a more almond-like appearance
- Avoid dark shadow on the inner corner — it enhances the roundness rather than balancing it
Deep-Set Eyes
- Light, reflective shades on the lid bring deep-set eyes forward visually
- Avoid very dark lid colors that push already recessed eyes further back
- A highlight shade on the brow bone lifts and brightens the entire eye area
Building an Eye Makeup Routine: Putting It All Together
The best eye makeup routine is one you’ll actually follow every day. Here’s how to build yours based on your available time and skill level.
The 5-Minute Eye (Everyday)
- Apply eyeshadow primer to the lid
- Sweep a matte neutral over the entire lid and into the crease
- Tightline the upper waterline with a pencil liner
- Apply two coats of mascara, wiggling from the root
The 15-Minute Eye (Elevated Daily)
- Prime the lid thoroughly
- Apply transition color to the crease and blend
- Pack lid color with a flat brush
- Deepen the outer corner with a darker shade
- Apply liner at the lash line — pencil, gel, or liquid
- Highlight the inner corner and brow bone
- Apply mascara to upper and lower lashes
The 30-Minute Eye (Special Occasion)
- Conceal and prime the lid for maximum longevity
- Build a full smoky eye, cut crease, or halo look
- Apply precise liner — winged, graphic, or layered
- Add glitter or duochrome as a focal point
- Apply individual lashes or a full strip if desired
- Set with setting spray to lock the entire look in place
Common Eye Makeup Mistakes and How to Fix Them
Even experienced makeup enthusiasts hit these pitfalls. Knowing them in advance saves you time, product, and frustration.
- Skipping primer — shadow creases within hours; primer is non-negotiable, not optional
- Applying too much product at once — always build up gradually; correcting overloaded shadow is nearly impossible
- Blending with a dirty brush — product buildup on your brush contaminates every color you touch; clean regularly
- Neglecting the lower lash line — it completes the look; even a simple smudge of liner or shadow below changes everything
- Pulling the eye while applying liner — this distorts the lid and makes the liner uneven when the eye relaxes; keep the skin neutral
- Applying mascara before shadow — fallout from shadow application lands on your mascara; always do shadow first
Conclusion:
Here’s everything that matters: eye makeup techniques become genuinely achievable the moment you understand the principles behind them rather than just following steps blindly. Know your tools, understand the three-color formula, build from blending before advancing to smoky eyes and cut creases, and match your technique to your specific eye shape.